T
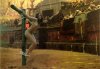
The Fallen Angel
Guest
I just do what I know works but there are some good tips here. Next I want to work with layers and simple lighting effects.

")
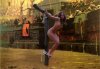
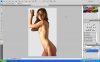
That would be another chapter, your's look pretty realistic!I couldn;t help addding a few stripes to her back.
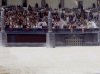
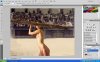
Here's a background we've used before. It's from Gladiator. The arena was based on the oil painting used in the first pic. It's 1.04 MB so it would be good as a background. It started off at 125Kb but you can always increase the "size" in pixels of a pic in photoshop by clicking on Image then Re size from the menu. I increase or decrease by a percentage which I guess.
...while this ol' tree still sticks with Corel (too much invested to swap) it is practice that makes it easier. I still screw up with layers. But never be ashamed of what you try.Well, I try to follow this learning but I do first translate and my technical language is limited; however, I've PSP4 ultimate (in french) and I'ld want to know if it is useful for this version; I've started to study it, but only some
"splutters"
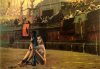
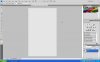
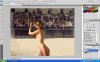
but be sure that you save it as a PNG or GIF file because you don't want a background behind JaninaNow click on File/Save as and save Janina as a PNG file in your folder, selecting none on the interface option.
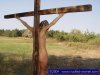
missing the beam.............................Your layer has now been saved and can be used later on any pic. Now use the lasso tool on the four corners of the rectangle then Edit/Copy. Bring up the background pic then Edit/Paste. Use the move tool and make any other adjustments you wish on the layer.