-
Sign up or login, and you'll have full access to opportunities of forum.
You are using an out of date browser. It may not display this or other websites correctly.
You should upgrade or use an alternative browser.
You should upgrade or use an alternative browser.
Some of my work - by Anwendungsfehler
- Thread starter Anwendungsfehler
- Start date

Anwendungsfehler
Executioner
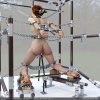
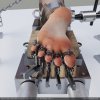
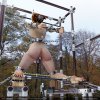
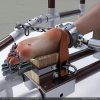
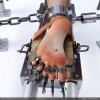
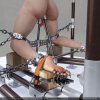
Except for the clamps I did model everything by hand. It is a modular Kitbash system which is equipped with snap! from blendermarket. I use kitops to create cutters and k packs. However I convert the result always to a mesh and do a bool cleanup by hand.Very nice models and renders. For the screws and stuff do you use kit-ops or something? or model them "by hand"?. And how exactly did you make the bar's length procedural in Blender?
The tubes are procedural, literally a face, solidify modifier, a chamfer and a little bevel modifier.
Anwendungsfehler
Executioner
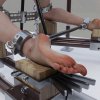
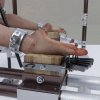
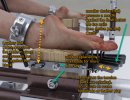
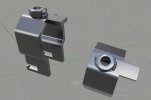
Info: *snap! is from bm (https://blendermarket.com/products/snap), rest done by myselfExcept for the clamps I did model everything by hand. It is a modular Kitbash system which is equipped with snap! from blendermarket. I use kitops to create cutters and k packs. However I convert the result always to a mesh and do a bool cleanup by hand.
The tubes are procedural, literally a face, solidify modifier, a chamfer and a little bevel modifier.
 . Bought the clamps used in the pussy region at cgtrader.com and "upgraded" them a bit.
seridur
Condemned
I guess there is an addon wihch makes adding these details easier, I assume it is kit ops, I never used it, just saw it can make adding boolean details and you can make your own kit elements. Also mesh machine can help in boolean cleanup, but that's an other addon I just saw in action. I don't do many hard surface so I didn't get these addons.
Anwendungsfehler
Executioner
Literally I'm using my brain for these. To have a matching identity on my parts, I doo most of the stuff by myself, but I don't want to reinvent the wheel for, e.g., nature elements or furniture.
I guess there is an addon wihch makes adding these details easier, I assume it is kit ops, I never used it, just saw it can make adding boolean details and you can make your own kit elements. Also mesh machine can help in boolean cleanup, but that's an other addon I just saw in action. I don't do many hard surface so I didn't get these addons.
I'm using Hops / Meshmachine occasionally (mostly alt+x
 ) but mostly I'm using the vanilla features. I'm using Looptools a lot, you just have to activate it, it is shipped with blender. If you don't have Hops/Boxcutter, just activate Booltools as well. Rest is pure practice.
If you need some help with blender, just join here at my Blender tech channel: https://discord.gg/aauq9pRs
Last edited:
seridur
Condemned
Sounds great, I'll hop in. Though these times I'm learning ue5 when I have some free time. (edit just joied, just under a different name (mz..))Literally I'm using my brain for these. To have a matching identity on my parts, I doo most of the stuff by myself, but I don't want to reinvent the wheel for, e.g., nature elements or furniture.
I'm using Hops / Meshmachine occasionally (mostly alt+x) but mostly I'm using the vanilla features. I'm using Looptools a lot, you just have to activate it, it is shipped with blender. If you don't have Hops/Boxcutter, just activate Booltools as well. Rest is pure practice.
If you need some help with blender, just join here at my Blender tech channel: https://discord.gg/aauq9pRs
Last edited:
Anwendungsfehler
Executioner
Anwendungsfehler
Executioner
Crucified Life
Magistrate
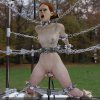
Those boobs are just crying out for some nippleclips!! Come on give the lady a break here!! That's clearly why she is screaming out like that. She is heavily restrained and can't put them on for herself!! And I think her body is crying out for whipping. To her thighs, butt, legs, tummy arms and boobs I think. I can't read her mind but I think I understand her needs well...
Anwendungsfehler
Executioner
Haha, I‘m still rigging/building that scene. Wonder if you have spottet a clamp lying on the floor in a pic before,have a look!Those boobs are just crying out for some nippleclips!! Come on give the lady a break here!! That's clearly why she is screaming out like that. She is heavily restrained and can't put them on for herself!! And I think her body is crying out for whipping. To her thighs, butt, legs, tummy arms and boobs I think. I can't read her mind but I think I understand her needs well...
Oh, and this rack has been redesigned exactly to reach her for caning/whipping.
This is just the very first picture in a series of many. More or less a learning/test place for me.
Oh, and she is not crying or shouting. Some parts are missing, but she looks so surprised without the blowjob trainer, so I have hidden them at the moment.
You will understand when this first pic is fully done in some weeks.
A lot of things are still missing and have to be built.
(hey, this is no ordinary render pic, quality over quantity hihi)
Last edited:
Crucified Life
Magistrate
Well it's looking good so far!! I can't wait!!Haha, I‘m still rigging/building that scene. Wonder if you have spottet a clamp lying on the floor in a pic before,have a look!
Oh, and this rack has been redesigned exactly to reach her for caning/whipping.
This is just the very first picture in a series of many. More or less a learning/test place for me.
Oh, and she is not crying or shouting. Some parts are missing, but she looks so surprised without the blowjob trainer, so I have hidden them at the moment.
You will understand when this first pic is fully done in some weeks.
A lot of things are still missing and have to be built.
(hey, this is no ordinary render pic, quality over quantity hihi)
Anwendungsfehler
Executioner
Anwendungsfehler
Executioner
thecuriousone
Governor
Very sadistic and a lot of detail, well done. I will visit this thread more often I guess.
Anwendungsfehler
Executioner
Anwendungsfehler
Executioner
Anwendungsfehler
Executioner
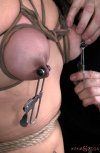
Playing with the multires modifiers and sculpt tools 
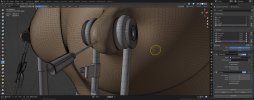
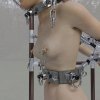
And this is why I love the multires modifier in Blender and Blender in general so much!
You need additional geometry without harming the uv map too much? No problem. Just replace the subsurface modifier by a multires modifier.
To make changes nondestructive, you just need to add a shape key, set the value to 1 and then start sculpting. Dial the value back to 0 brings back the vertices position before you've started.
And the best: It won't harm any other morphs/shapekeys.
I go for subdiv 3, this is more than enough at the moment. The next picture will show the renderresult. The texture doesn't use any displacement map, so the texture looks flat at the moment. But - and that's why I'm using the multires - in the next step I will add some alpha brushes to add details to the skin, directly to that shapekey. The alphabrush modifies the "virtual" subdiv 3 only. If this value is too low, I will go for subdiv 4, and depending on the memory situation, I will bake a displacement later to save memory.
As you can see, rawly sculpted it looks nice at all, need some fine tune on various places. due to the fact I'm not only mirroring the sculpt the 2nd breast needs more love.
The next step is to add some skin details to reflect more realism.
Anwendungsfehler
Executioner
Protagonists for my story:
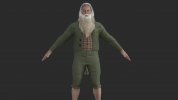
Bergöha, Till
Bergöha, Till, Geiler Alter Sack, retired engineer, blacksmith.
Builds all the nice torture devices for his beloved granddaughter Heidemarie, and fucks/punishes Gwendoline occasionally.
First test in Daz, will be modified in Blender.
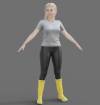
Heidemarie, his granddaughter.
Heide, 24yrs old, close fuckfriend to Schaf Olaf, sometimes drummer in a local newbie Death Metal Band named Dishwasher Maggots.
She lives with her grandpa "Bergöha" Till in the rural Bielefelder Mountains, part of duchy Bielefeld, a small, mostly unknown country somewhere around Austria, Germany and Swizerland.
Her grandpa and she hold Gwendoline as their personal slave in their farmyard, punishing and dominating her for being a misbehaving insta influenza and, of course for our pleasure . Heide is looking like an innocent Angel but she seems to be a pretty cruel demon ... hrhr.
Made her a bit heavier now, better for excessive facesitting / toilet slave pussy cleaning sessions...
Heidemarie fulfills now the Heidi cliché a bit better ....
Inspired by
Till Lindemanns new song "Dicke Titten"



Bergöha, Till
Bergöha, Till, Geiler Alter Sack, retired engineer, blacksmith.
Builds all the nice torture devices for his beloved granddaughter Heidemarie, and fucks/punishes Gwendoline occasionally.
First test in Daz, will be modified in Blender.

Heidemarie, his granddaughter.
Heide, 24yrs old, close fuckfriend to Schaf Olaf, sometimes drummer in a local newbie Death Metal Band named Dishwasher Maggots.
She lives with her grandpa "Bergöha" Till in the rural Bielefelder Mountains, part of duchy Bielefeld, a small, mostly unknown country somewhere around Austria, Germany and Swizerland.
Her grandpa and she hold Gwendoline as their personal slave in their farmyard, punishing and dominating her for being a misbehaving insta influenza and, of course for our pleasure . Heide is looking like an innocent Angel but she seems to be a pretty cruel demon ... hrhr.
Made her a bit heavier now, better for excessive facesitting / toilet slave pussy cleaning sessions...
Heidemarie fulfills now the Heidi cliché a bit better ....
Inspired by
Till Lindemanns new song "Dicke Titten"


Anwendungsfehler
Executioner
captivecuties
Senator
Love that needle placementPlaying with the multires modifiers and sculpt tools
View attachment 1184349View attachment 1184350
And this is why I love the multires modifier in Blender and Blender in general so much!
You need additional geometry without harming the uv map too much? No problem. Just replace the subsurface modifier by a multires modifier.
To make changes nondestructive, you just need to add a shape key, set the value to 1 and then start sculpting. Dial the value back to 0 brings back the vertices position before you've started.
And the best: It won't harm any other morphs/shapekeys.
I go for subdiv 3, this is more than enough at the moment. The next picture will show the renderresult. The texture doesn't use any displacement map, so the texture looks flat at the moment. But - and that's why I'm using the multires - in the next step I will add some alpha brushes to add details to the skin, directly to that shapekey. The alphabrush modifies the "virtual" subdiv 3 only. If this value is too low, I will go for subdiv 4, and depending on the memory situation, I will bake a displacement later to save memory.
As you can see, rawly sculpted it looks nice at all, need some fine tune on various places. due to the fact I'm not only mirroring the sculpt the 2nd breast needs more love.
The next step is to add some skin details to reflect more realism.


