@bulldog.69 asked me how I create my illustrations, so I decided to show you all. In another thread there was a discussion about my original paper illustrations that I circulated to the email group before I started with Photoshop and did the PETRA series. My method hasn't changed, just the medium. I still draw, ink, and paint. Before it was with a pencil and art markers. Now its with a Wacom tablet (still the same after nearly 20 years of use) on Photoshop. My Wacom tablet is plug-and-play while the modern ones are bluetooth. I haven't upgraded because ol' reliable remains ol' reliable. It's also something about all my illustrations for nearly the last 20 years having been made on the same device, which is pretty cool to me. It's like using the same pencil.
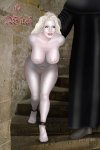
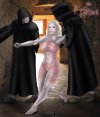
Anyway, let's use my recent illustration of poor Agnes in the Scavenger's Daughter. This is the same method used in the comic book industry for the last 2 decades. I start off with a sketch. I like blue color for people and red for outfits or instruments so they are easily distinguishable. I pay special attention to the face, hands, and feet. Those are the most important parts of the body to me as they convey the best aesthetics and expressions.
I then do what is called "inking" of the drawing over the sketch in black. Here I use more precision for cleaner lines, while the sketch is more free flowing. I then prepare for painting and create a "flats" image. It's known as flats because flat colors are used and each part is easily distinguishable. This is necessary for the painting because, for instance, Agnes' body is all one color in final image but I need the plains of the legs, arms, etc. in order to do highlighting and shading.
Photoshop has a cool "magic wand" tool which lets you click on a color and that color is highlighted and will be the only color you can paint. I clicked on the various colors on the "flats" image and painted the base colors for the illustration.
I then proceed to do shading and highlighting on the color image. I always start on the eyes and face. If they come out well I know the illustration will come out well. After that I add the necessary effects such as tears, sweat, dirt, etc. Finally, I bring in the background and do the scenery shading such as shadows and light.
Hope you all enjoyed this little insight into how I create my illustrations. It may one day be a dying art, but I enjoy it immensely and as long as I am able to still draw I'll continue to follow this method, which I learned 20 years ago when I bought an instructional CD set made by a professional comic book artist.
View attachment 1453655View attachment 1453656View attachment 1453657View attachment 1453658View attachment 1453659View attachment 1453660View attachment 1453661


") <3
<3